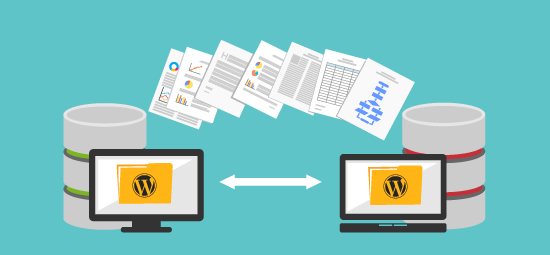
We at WPWebHost believe every second and minute count. So we have pledged ourselves to make sure all migrations of WordPress blogs are completed without downtime.
We have compiled a short tutorial to help other WordPress users who are considering migrating their blogs from other hosting providers to WPWebHost such as custom domain WordPress.com, custom domain Blogspot, custom domain Posterous and custom domain Tumblr.
First of all, you will need to get the IP address of your new hostname from your new hosting provider.
Let say the new IP address is xx.xx.xx.xx and your domain name is newdomain.com
Next, please proceed to export your blog from your existing provider.
For self-hosted WordPress migration, you will need to perform a backup following the steps below:
1. Log into your FTP account to download all of your webfiles
2. Use PHPMyAdmin to back up your MySQL database as .sql file.
Alternatively, you can run a cPanel full backup of your hosting account if you are using cPanel control panel. Next, download it via FTP to your local machine. Keep a few backups for safety purposes.
For blogs hosted on WordPress.com, you can generate the XML file by referring to this tutorial.
For blogs hosted on Google’s Blogspot, you can generate your blog posts via this tutorial.
For blogs hosted on Posterous, there is no direct way to export a blog from Posterous. Therefore, we recommend that you use this trick. Next, repeat the steps of WordPress.com to get your XML file.
For blogs hosted on Tumblr, make use of this trick or this trick to get your blog’s raw XML file.
For other blogs hosted on other providers, you could Google it and find out yourself how to generate your own raw blog files.
Then, here comes the magic part.
Warning: Please make a backup copy of your host file before modifying your hostname file so that you can revert to your original host file after the migration is done.
Mac OS X users:
1. Open terminal.app (Application -> Utilities -> Terminal
2. type: sudo nano /etc/hosts
3.type your password when prompted
4. Add this line at the end of file:xx.xx.xx.xx newdomain.com
xx.xx.xx.xx www.newdomain.com5. Press Control-O to save the file, press Enter on filename prompt.
6. Press Control-X to exit the text editor.
7. (optional) Flush DNS cache with the command: dscacheutil -flushcache8. Visit http://newdomain.com and install your WordPress.
9. Try to ping with your terminal and see if it is resolving to xx.xx.xx.xx and install your WordPress
Windows users:
1. Go to C:WindowsSystem32driversetc
2. Open hosts file with notepad.exe
3. Add the following:xx.xx.xx.xx newdomain.com
xx.xx.xx.xx www.newdomain.com
4. Save.
5. Visit http://newdomain.com.6. Try to ping your command prompt and see if it is resolving to xx.xx.xx.xx and install your WordPress
Linux/Ubuntu users:
1.Go to Application –> Accessories –> Terminal
2. key in the following: sudo gedit /etc/hosts
3. Under 127.0.1.1 , input the following:xx.xx.xx.xx newdomain.com
xx.xx.xx.xx www.newdomain.com4. Click Save
5. Close gedit and terminal.
6. Visit http://newdomain.com7. Try to ping and see if it is resolving to xx.xx.xx.xx and install your WordPress
After you have completed your WordPress installation, proceed with the blog import via the raw file by referring to this tutorial.
Then try set up your themes, plugins, etc until everything is nice and smooth with the new host. Then revert to default files and update the nameserver of your domain to the new nameservers provided by your new host.
There shall be NO downtime at all as your blogs are still actively hosted on your provider and when you change the nameserver, it will be smoothly updated to your new host with readily browsed WordPress site.
It will take approximately 24-48 hours for your domain to propagate completely worldwide, so please avoid updating your WordPress in the next 48 hours to prevent your work from updating on your old host.
Done! Have fun!