Below are the steps to accelerate your WordPress loading speed throughout every part of the world.
Stage 1: Integrate WordPress With CDN
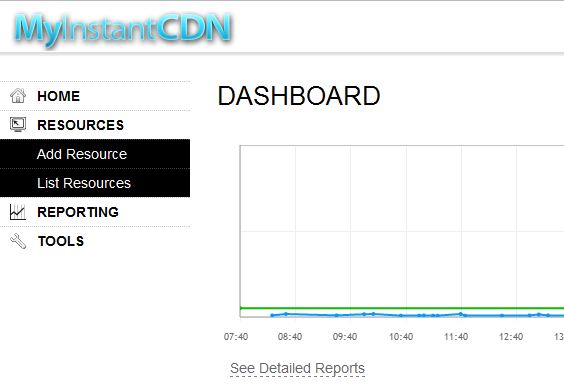
- First, login to your CDN portal via http://portal.myinstantcdn.com and click Add Resource.
- You will then see one Add CDN Site page. In the settings panel, configure it by stating your CDN Hostname and the origin site. Below is the sample of a snapshot on you can configure the CDN. To enter CDN Hostname, type cdn.yourdomain.com and origin site at yourdomain.com

- Check on box for Advanced Setting and you will be able to configure features like Hotlinking Protection, Content Partitioning, URL Signing and also Multiple Origins. You may skip this settings if you does not require the features.
- By clicking OK, you will then see the next page which will have a resource validation or CNAME record that will state that your CDN is Active.
- Then, go to your control panel (cPanel) and configure the CNAME record that requires to refer the CDN hostname to the CDN record by clicking Simple DNS Zone Editor in your cPanel. Just follow the sample in this below’s image to configure the CNAME record.

- After configuring it, log out from your cPanel and you are done with the first setup stage. You will then have to proceed to Stage 2 of setting up the CDN.
Stage 2: Activate W3 Total Cache Plugin and enable the CDN
After finishing the first stage, you may need to go back to your CDN portal again and do the following by clicking Resources > List Resources > Select the CDN that you created and click it.
You will then see a page that state Migrate to CDN and click WordPress and follow the instruction in the portal as you will need a W3 Total Cache Plugin to integrate the CDN. The page will look something like this.
- First, download the W3 Total Cache plugins. Once you installed W3 Total Cache plugins, you will get the Performance tab below your dashboard settings.
- Click General and you will see the Preview Mode is enabled. Turn it off by clicking the Disable button and your General panel in you Performance tab should look like this screenshot.

- Then, Scroll down and look for “Content Delivery Network” panel in the General page of Performance tab and choose enable CDN services by clicking the checkbox and select Original Pull (Mirror) for the CDN Type and click save all settings.

- Click CDN at the Performance tab and look for Configuration panel in the CDN page. Replace site’s hostname with your CNAME you created. (In this case scenario, I just type cdn.drunkenmunkie.com) which I just created in the first stage and click Save All Settings.

- After completing all the steps and also this two stages, your blogs in WordPress are now being integrated with your CDN services.