In a certain conditions, we will come across the need to optimize how the website will look when it gets printed. There are plugins from the WordPress directory but if you are looking at specific styling, this article will guide you to create a print stylesheet i.e. print.css
This step by step guide will help you to create a print.css for your own WordPress website.
Step 1: Add print.css
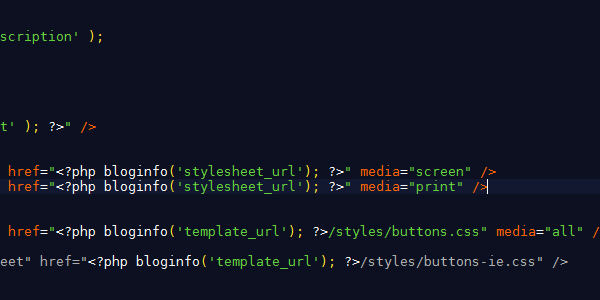
Firstly, what you need to do is to create and add a new stylesheet file to your current theme folder. We will name it print.css and the location of the print.css will be in the same directory as the style.css regardless it is a child theme or parent theme.
<link rel="stylesheet" type="text/css" href="<?php
bloginfo('stylesheet_directory'); ?>/print.css" media="print">
Note for developers:
If you are developing the print.css in a staging environment, you can set the print.css media properties to screen media="screen" and remove (or commented) the default CSS so that you can focus on optimizing the print.css
Step 2: Remove unnecessary element
In order to do this, you can use display: none to the ID or class of the element you wish to remove from being printed.
Example for removed element for WPWebHost blog (menu, sidebar, comment, footer.
 #menu {
display: none;
}
#sidebar {
display: none;
}
#comment-wrap {
display: none;
}
#footer {
display: none;
}
Step 3: Optimize
After removing the elements, few things to optimize are
- Readable and reasonably size font:
font-size: 1em, font-family: Arial, sans-serif; - Set background colour to white,
#ffffff. White will never get printed. - Utilize page width to 100%. Set the width of the page container to be 100%.
Step 4: Style for links
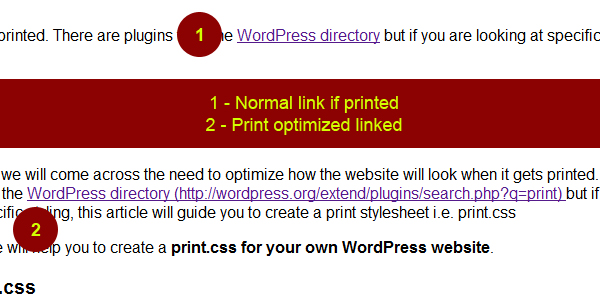
Create a meaningful URL note when user print the page
In the above example, we can see that (1) is the example of normal link if it is printed. It is meaningless on paper since we can’t revisit the link if it needs to, hence a solution to this to append the URL of the link next to it as shown (2).
Below is a simple CSS code to achieve the above:
a:link:after, a:visited:after { content: " (" attr(href) ") "; font-size: 90%; }
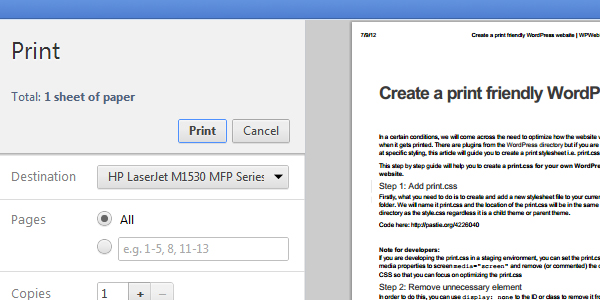
Step 5: Compose your print.css
Once completed, you can test your print.css by using the Print preview function on your web browser. Ctrl + P for Windows or Cmd + P for Mac.
Step 6: Compose
Once completed, you can upload your print.css to your WordPress directory. For developers, just switched the media properties to screen media="print"
Discover more from Hosting Mate
Subscribe to get the latest posts sent to your email.