
Is your website being protected with SSL (Secure Sockets Layer) certificate? Or how do you check it? Browse your website and look at the address bar, with an SSL certificate, your website URL will start with “https://” instead of “http://”.
SSL Certificates help to protect your login details, file transfer, secure your personal info and build a trustable BRAND for online business. In addition, your website visitors/potential customers will notice a green [Secure] word in the website address bar. Most importantly, your site will get a better ranking in Google search result when you have a SSL certificate, as Google prefer to provide a safer online environment to their users.
We understand that installing a SSL certificate might be vital but complicated for you, thus Let’s Encrypt is installed in our hosting plan. Let’s Encrypt is a certificate authority (CA) that allows you to create a free SSL certificate for your domains. In this article, we will show you how to enable free SSL for your site in just few steps!
Steps to get a FREE SSL Certificate for your WordPress website:
- Login to your Plesk Control Panel.
- Go to Websites & Domains > example.com > Let’s Encrypt where example.com is the name of the desired domain.
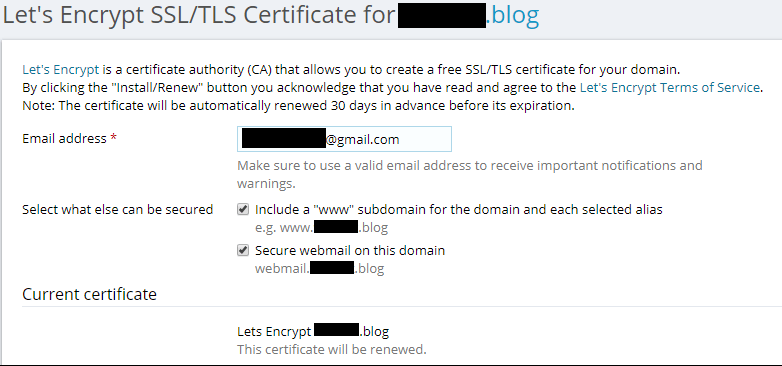
- Specify the email address that will be used for urgent notices and lost key recovery. By default, the email address of the subscription owner is used.
- Specify if you want to include an alternative domain name for the domain and each selected alias, for example: www.example.com for example.com. We recommend that you select this check box.
- Specify if you want to include webmail, for example: webmail.example.com. We recommend selecting this checkbox.
- Click Install to get and install the Let’s Encrypt certificate for the domain.
- Go to Websites & Domains > example.com > Hosting settings and the Security section, select both of the checkbox (‘SSL/TLS support‘ and ‘Permanent SEO-safe 301 redirect from HTTP to HTTPS ‘ and save.
- And now you’ll see your domain is secured like this!

.


