In Unix/Linux systems, the root user account is the super user account, and it can therefore be used to do anything and everything achievable on the system.
However, this can be very dangerous in so many ways – one could be that the root user might enter a wrong command and breaks the whole system or an attacker gets access to a root user account and takes control of the whole system and who knows what he/she can possibly do.
Based upon this background, in Ubuntu and Ubuntu derivatives, the root user account is locked by default, regular users (system administrators or not) can only gain superuser privileges by using the sudo command.
And one of the worst things that can happen to a Ubuntu System admin is losing privileges to use the sudo command, a situation commonly referred to as “broken sudo”. This can be absolutely devastating.
A broken sudo may be caused by any of the following:
- A user should not have been removed from the sudo or admin group.
- The /etc/sudoers file was altered to prevent users in the sudo or admin group from elevating their privileges to that of root using the sudo command.
- The permission on /etc/sudoers file is not set to 0440.
In order to perform crucial tasks on your system such as viewing or altering important system files, or updating the system, you need the sudo command to gain superuser privileges. What if you are denied usage of sudo due to one or more of the reasons we mentioned above.
Below is an image showing a case in which the default system user is being prevented from running the sudo command:
[email protected] ~ $ sudo visudo
[ sudo ] password for aaronkilik:
aaronkilik is not in the sudoers file. This incident will be reported. [email protected] ~ $ sudo apt install vim
[ sudo ] password for aaronkilik:
aaronkilik is not in the sudoers file. This incident will be reported.
How To Fix Broken sudo Command in Ubuntu
If you happen to be running only Ubuntu on your machine, after powering it, press the Shift key for a few seconds to get the Grub boot menu. On the other hand, if you are running a dual-boot (Ubuntu alongside Windows or Mac OS X), then you should see the Grub boot menu by default.
Using the Down Arrow, select “Advanced options for Ubuntu” and press Enter.
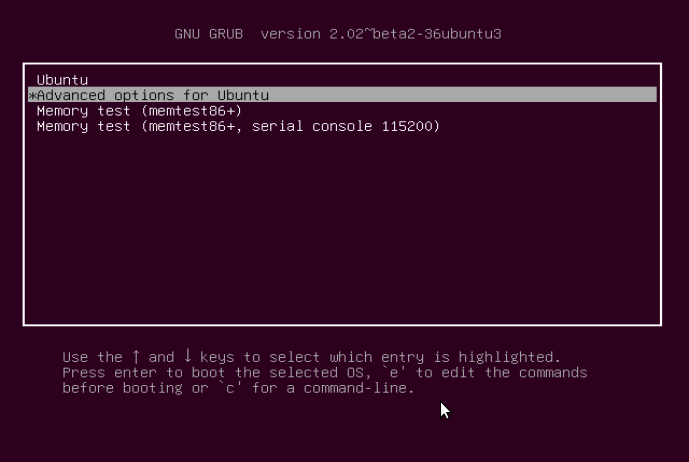
You will be at the interface below, select the kernel with the “recovery mode” option as below and press Enter to advance to the “Recovery menu”.
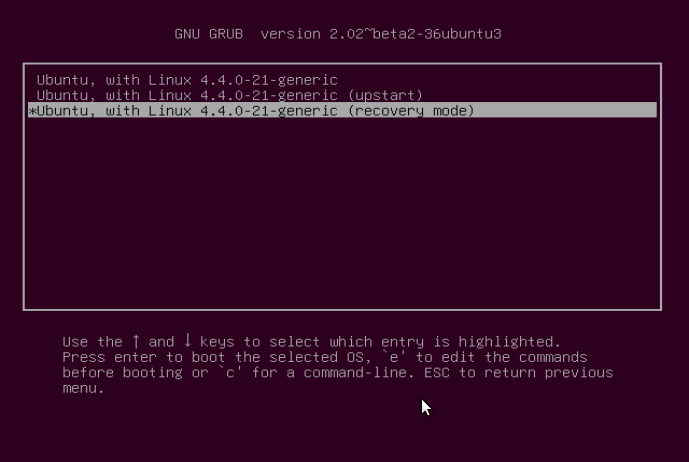
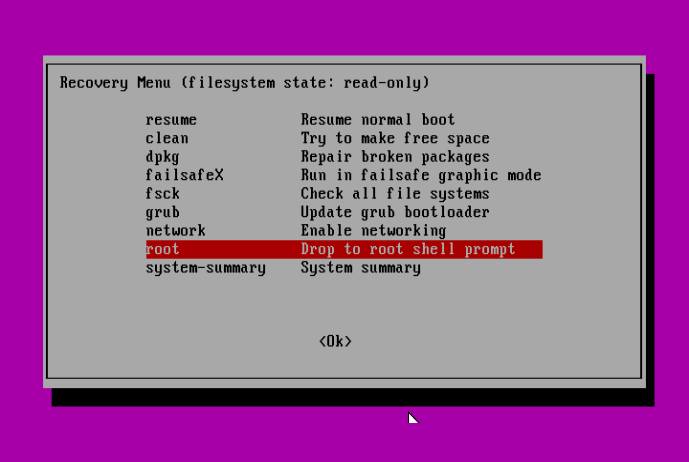
Below is the “Recovery menu”, indicating that the root filesystem is mounted as read-only. Move over to the line “root Drop to root shell prompt”, then hit Enter.
Next, press Enter for maintenance:
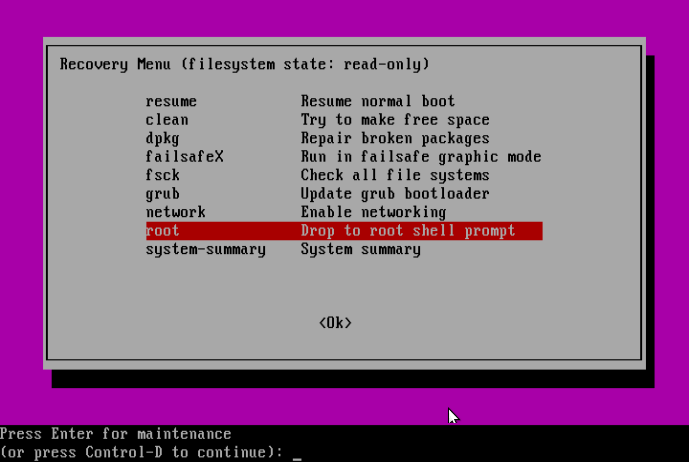
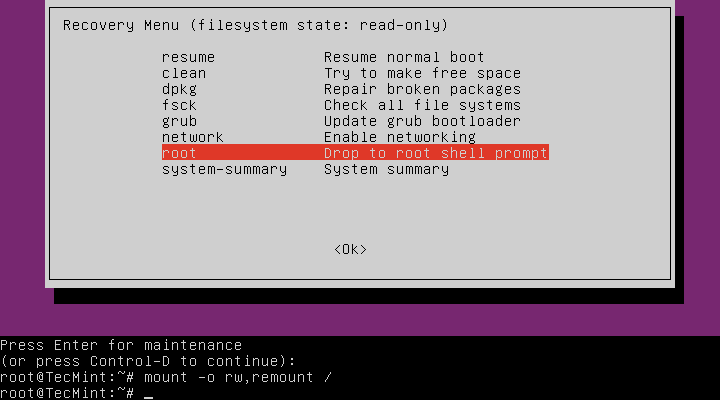
At this point, you should be at the root shell prompt. As we had seen before, the filesystem is mounted as read-only, therefore, to make changes to the system we need to remount is as read/write by running the command below:
# mount -o rw,remount /
Solving Case #1 – Add User to sudo or admin Group
Assuming that a user has been removed from the sudo group, to add the user back to the sudo group issue the command below:
# adduser username sudo
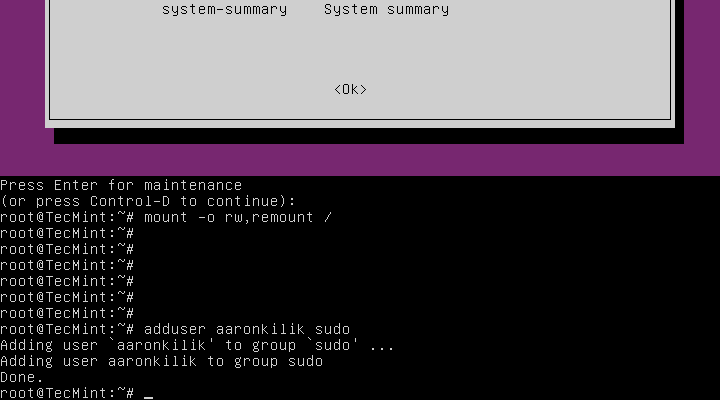
Or else, under the condition that a user has been removed from the admin group, run the following command:
# adduser username admin
Solving Case #2 – Granting sudo Privileges to Users
On the assumption that the /etc/sudoers file was altered to prevent users in the sudo or admin group from elevating their privileges to that of a super user, then make a backup of the sudoers files as follows:
# cp /etc/sudoers /etc/sudoers.orginal
Subsequently, open the sudoers file.
# visudo
and add the content below:
#
# This file MUST be edited with the 'visudo' command as root.
#
# Please consider adding local content in /etc/sudoers.d/ instead of
# directly modifying this file.
#
# See the man page for details on how to write a sudoers file.
#
Defaults env_reset
Defaults mail_badpass
Defaults secure_path="/usr/local/sbin:/usr/local/bin:/usr/sbi$ # Host alias specification # User alias specification # Cmnd alias specification # User privilege specification
root ALL=(ALL:ALL) ALL # Members of the admin group may gain root privileges
%admin ALL=(ALL) ALL # Allow members of group sudo to execute any command
%sudo ALL=(ALL:ALL) ALL # See sudoers(5) for more information on "#include" directives: #includedir /etc/sudoers.d
Solving Case #3 – Setting Correct Permission on sudoers File
Supposing that the permission on the /etc/sudoers file is not set to 0440, then run the following command to make it right:
# chmod 0440 /etc/sudoers
Last but not least, after running all the necessary commands, type the exit command to go back to the “Recovery menu”:
# exit
Use the Right Arrow to select <Ok> and hit Enter:
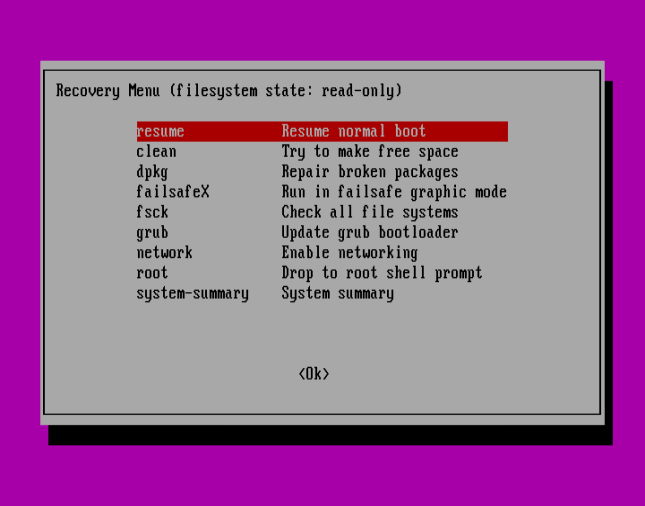
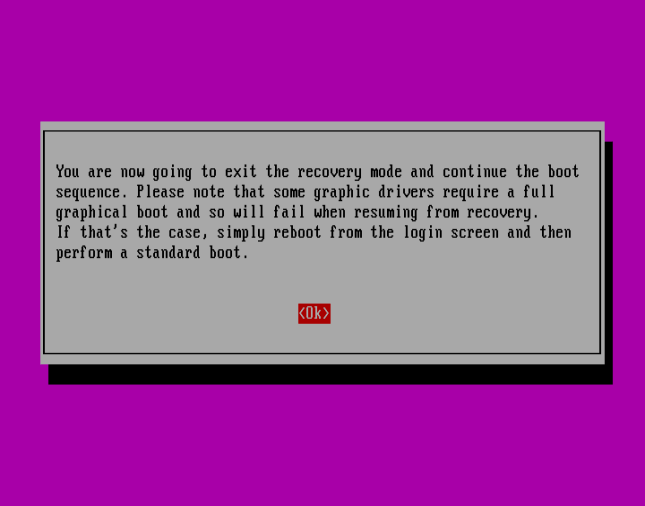
Press <Ok> to continue with normal boot sequence:
Summary
This method should work just fine especially when it is an administrative user account involved, where there is no other option but to use the recovery mode.
However, if it fails to work for you, try to get back to us by expressing your experience via the feedback section below. You can as well offer any suggestions or other possible ways to solve the issue at hand or improve this guide altogether.

