Learning Thematic hooks and creating Thematic child theme
WordPress helps you build professional sites with minimum efforts required. To give your WordPress site a unique look one needs to create a custom theme to give your site the unique identity. But creating a WordPress theme from scratch could be a tedious process . So in the article I am going to explain how you can use the Thematic Theme framework and create child theme using the Thematic hooks.
Step 1: Getting Thematic framework.
The thematic framework is licensed under GPL like WordPress and can be downloaded from the WordPress site itself .In fact it is one of the top downloaded themes from the WordPress site. You can grab your copy from http://wordpress.org/extend/themes/thematic and upload to the wp-contentthemes folder of your WordPress installation.
Step 2: Creating your Thematic child theme
To create a child theme first create a folder ‘thematic child’ in your wp-contentthemes and create a file called style.css with the following lines . .
/*
Theme Name: Thematic Chld
Theme URI: http: //example.com/
Description: Child theme for the Thematic
Author: Your name here
Author URI: http: //example.com/about/
Template: Thematic
Version: 0.1.0
*/
If everything has gone correct in the themes section of your admin you will see your child theme now . Activate the child theme from the admin.
Note :- you can read more in detail about WordPress child themes at http://codex.wordpress.org/Child_Themes
Step 3: Getting the lay out correct
After activating the child theme now if you see your blog you will see the lay out is not proper. This happens because now your style.css has overridden the parent thematic theme style.css and you have provided no layout in your style.css . You can provide your own style in the style.css , but again we will use the power the thematic framework and import the css provided by the thematic framework . The parent thematic contains a number of layouts which we can use from
2 columns layout with sidebar on right
2 columns layout with sidebar on left
3 columns with one sidebar on right and one on left
3 columns with two sidebars on right.
Let us use 3 columns layout with one sidebar on right and one on left for our child theme . Add the following lines yto the style.css in your child theme .
If all has gone good you will have a nice 3 columns layout child theme ready.
Step 4: Styling in your child theme
Now once the lay out is done you an style your theme by changing its colors by adding them to the style.css of your child theme . You can either use some tool like firebug etc to figure out the element tag name of the element or check the default.css in the parent thematic folder. We will change the body background color , the header color and the links and heading of the sidebars. Please add the following ode to the style.css of your child theme.
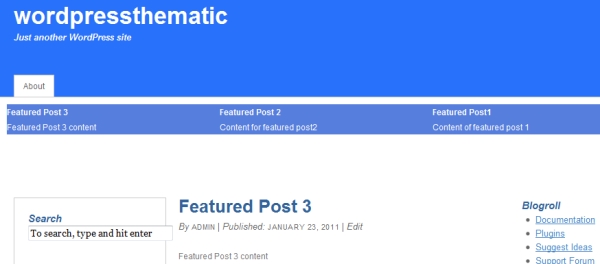
Step 5: Creating a featured post section on the home page
Now lets create a section below the header on the home page to display the post of category named – featured . First create a category named featured and assign 3 post to that category. We want to display the featured post on the home just below the header and above the main section . To do this thematic provides an action hook called thematic_belowheader on which we will hook our function to display the posts in the featured category for home page. Create a new file functions.php in your child theme folder and add the following code to it
<?php function child_list_category($categoryname) {
?>
 <div id="featureposts">
<?php
    $catOfFeatured  = get_cat_ID($categoryname);
    query_posts('cat='.$catOfFeatured.'&showposts=3');
    while (have_posts()) : the_post();  ?>
        <div>
            <div>
             <h3><?php the_title(); ?></h3>
             <?php the_content(); ?>
             </div> <!-- end featurepostcontent -->
        </div><!-- end featurepostbox -->
    <?php endwhile; ?>
    </div><!-- end featurepostbox -->
<?php
} function child_list_featured_category() { if( is_home() ) child_list_category('featured');
} add_action('thematic_belowheader', 'child_list_featured_category', 10);
The function child_list_category just displays the post from a particular category . Then we hook our function child_list_featured_category to the thematic action hook using add_action(‘thematic_belowheader’, ‘child_list_featured_category’, 10); to display the featured post on the home page. To get the styling correct we have to add the following style to style.css of child theme.
To display related post after every post first download the plugin http://wordpress.org/extend/plugins/yet-another-related-posts-plugin/installation/ and activate it . Now we are going to use one more action hook provided by thematic called thematic_postfooter to which you can hook and display content after each post. So we use this hook and the above downloaded plugin to display related post below each post. To do this please add the below code to functions.php
function child_belowpost() { if ( function_exists('related_posts') ) related_posts() ;
} add_action('thematic_postfooter', 'child_belowpost', 10);
Here the function child_belowpost is hooked below the post and used the theme function related_posts provided by t he plugin above which displays the related post to the current post.
So this is how we can added functionalities to our site using the different hooks provided by thematic without changing any code in the parent thematic theme. You can get a more elaborate list of all the hooks provided by thematic from http://themeshaper.com/thematic/guide/?page_id=10
Step 7: Changing the footer link using Thematic filters
Like hooks thematic also provided quite a few filters which we can use in our child theme. We will use the thematic_theme_link filter to provide you child theme url instead of thematic url . To provide your child theme URL added the following code to child themes functions.php
This basically uses the ‘thematic_theme_link’ filter and returns the child theme url which you provide.
You can get a complete list of the filters provided by thematic from http://themeshaper.com/thematic/guide/?page_id=12
Step 8: Adding more widgetized Area in thematic child
Thematic has a lot of widgeized areas by default on which widgets can be dropped from the WordPress admin. In all by default there are 13 widgetize areas by default in thematic frame work. Your child theme will also by default have all these widgetize areas. But you might want more widgetize area , so that you can drop widgets at those specifics places on your theme. Add the following code to your functions.php
Here we are first registering a widgeized area using the WordPress api register_sidebar . Then using the Thematic hook ‘thematic_abovefooter’ to register his area above the footer. Now you can drop the widgets on this area from the WordPress admin as shown belo.
And the content of he widget will be shown above the footer in your WordPress front end as shown below
Step 9: Adding more theme options to the thematic child theme.
Thematic by default has some theme options that can be choosen and changed from the WordPress admin. Now we will add more options specific to our child theme which can be changed from the WordPress admin . Lets make the displaying of the featured post on the home page controlled be a theme option. In the file themesthematiclibraryextensionstheme-options.php thematic has the code to read the options from a global array called $options . So to add our child theme option we will hook on the init hook of WordPress and add our child theme specific options to this array . So the default code in thematic will also add our theme option. Add the following code to functions.php
function add_child_theme_option(){
global $options,$shortname; $newoption = array("name" => __('Display Featured listing on home page','thematic'),
                   "desc" => __("Display Featured listing on home page",'thematic'),
                   "id" => $shortname."_displayfeatured",
                    "std" => false,
                     "type" => "checkbox"); array_push($options,$newoption); }
add_action( 'init', 'add_child_theme_option', 1 );
Now lets change our function child_list_featured_category to even check the value of this option to decide whether to display the theme option or no.
function child_list_featured_category() {
global $shortname;
if( is_home() && get_option( $shortname."_displayfeatured" ) ) child_list_category('featured');
}
Now you can control if the featured posts are seen on home page or no from the theme options.
Bombshell of Thematic Theme Framework
Thematic is a great theme frame work to build WordPress themes and sites on . It provides a lot of features by itself like
Different layouts
Lots of widgetized areas
Theme options etc.
With all the above things provided thematic provides a lot of hooks and filters in which your child theme can plugin and functionality and content as required without changing anything in the parent thematic framework.So using the power of the thematic framework it becomes very simple to create custom themes which can be used for your WordPress site.
If you feel like building your own website or blog, you can always find a professional developer who could get this done for you in the shortest possible time. However, it might be much more…
There are countless Linux distributions available, a vast majority are free to download and use. Some are more appropriate for performing particular tasks than others. For example, Ubuntu, Mint, and Elementary OS are more recommended…
Ubuntu is one of the most widely used and popular Linux distributions, that comes in multiple editions including Ubuntu Desktop, Ubuntu Server, and Ubuntu Core to mention a few. Ubuntu Desktop is a perfect choice…
Text editors can be used for writing code, editing text files such as configuration files, creating user instruction files, and many more. In Linux, text editors are of two kinds that is the graphical user…
WordPress is undoubtedly the most widely used Content Management System (CMS) for websites and blogs. However, just like any CMS, it does contain certain vulnerabilities that are open to the exploitation of hackers/scammers. As a…
More is a *nix command line used to display the contents of a file in a console. The basic usage of more command is to run the command against a file as shown below: Read…