Let’s assume that you have 30GB of movies and you have 3 drives each 20 GB in size. So how will you store?
Obviously you can split your videos in two or three different volumes and store them on the drive manually. This certainly is not a good idea, it is an exhaustive work which requires manual intervention and a lots of your time.
Another solution is to create a RAID array of disk. The RAID has always remained notorious for loss of storage reliability and usable disk space. Another solution is mhddfs.
mhddfs is a driver for Linux that combines several mount points into one virtual disk. It is a fuse based driver, which provides a easy solution for large data storage. It combines all small file systems to create a single big virtual filesystem which contains every particle of its member filesystem including files and free spaces.
Why you need Mhddfs?
All your storage devices creates a single virtual pool and it can be mounted right at the boot. This small utility takes care of, which drive is full and which is empty and to write data to what drive, intelligently. Once you create virtual drives successfully, you can share your virtual filesystem using SAMBA. Your client will always see a huge drive and lots of free space.
Features of Mhddfs
- Get attributes of the file system and system information.
- Set attributes of the file system.
- Create, Read, Remove and write Directories and files.
- Support for file locks and Hardlinks on single device.
| Pros of mhddfs | Cons of mhddfs |
| Perfect for home users. | mhddfs driver is not built in the Linux Kernel |
| Simple to run. | Required lots of processing power during runtime |
| No evidence of Data loss | No redundancy solution. |
| Do not split the file. | Hardlinks moving not supported |
| Add new files to the combined virtual filesystem. | |
| Manage the location where these files are saved. | |
| Extended file attributes |
Installation of Mhddfs in Linux
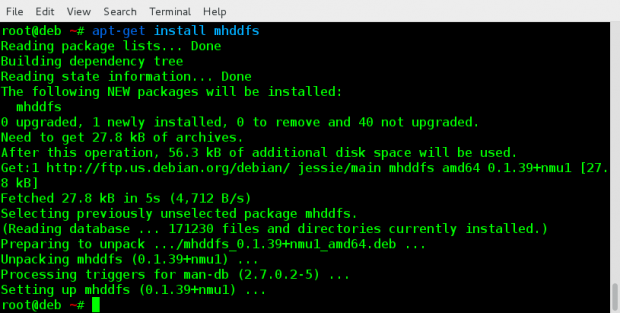
On Debian and portable to alike systems, you can install mhddfs package using following command.
# apt-get update && apt-get install mhddfs
On RHEL/CentOS Linux systems, you need to turn on epel-repository and then execute the below command to install mhddfs package.
# yum install mhddfs
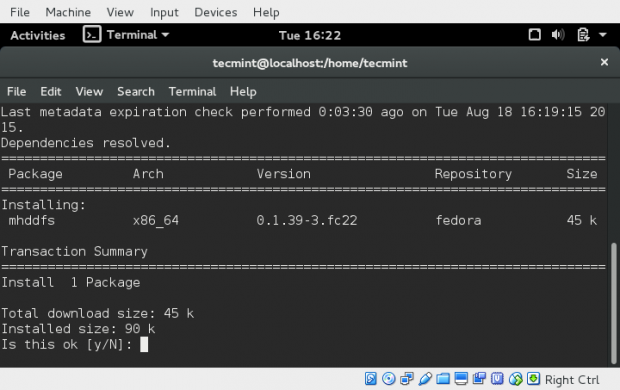
On Fedora 22+ systems, you may get it by dnf package manger as shown below.
# dnf install mhddfs
If incase, mhddfs package isn’t available from epel repository, then you need to resolve following dependencies to install and compile it from source as shown below.
- FUSE header files
- GCC
- libc6 header files
- uthash header files
- libattr1 header files (optional)
Next, download the latest source package simply as suggested below and compile it.
# wget http://mhddfs.uvw.ru/downloads/mhddfs_0.1.39.tar.gz
# tar -zxvf mhddfs*.tar.gz
# cd mhddfs-0.1.39/
# make
You should be able to see binary mhddfs in the current directory. Move it to /usr/bin/ and /usr/local/bin/ as root.
# cp mhddfs /usr/bin/ # cp mhddfs /usr/local/bin/
All set, mhddfs is ready to be used.
How do I use Mhddfs?
1. Lets see all the HDD mounted to my system currently.
$ df -h
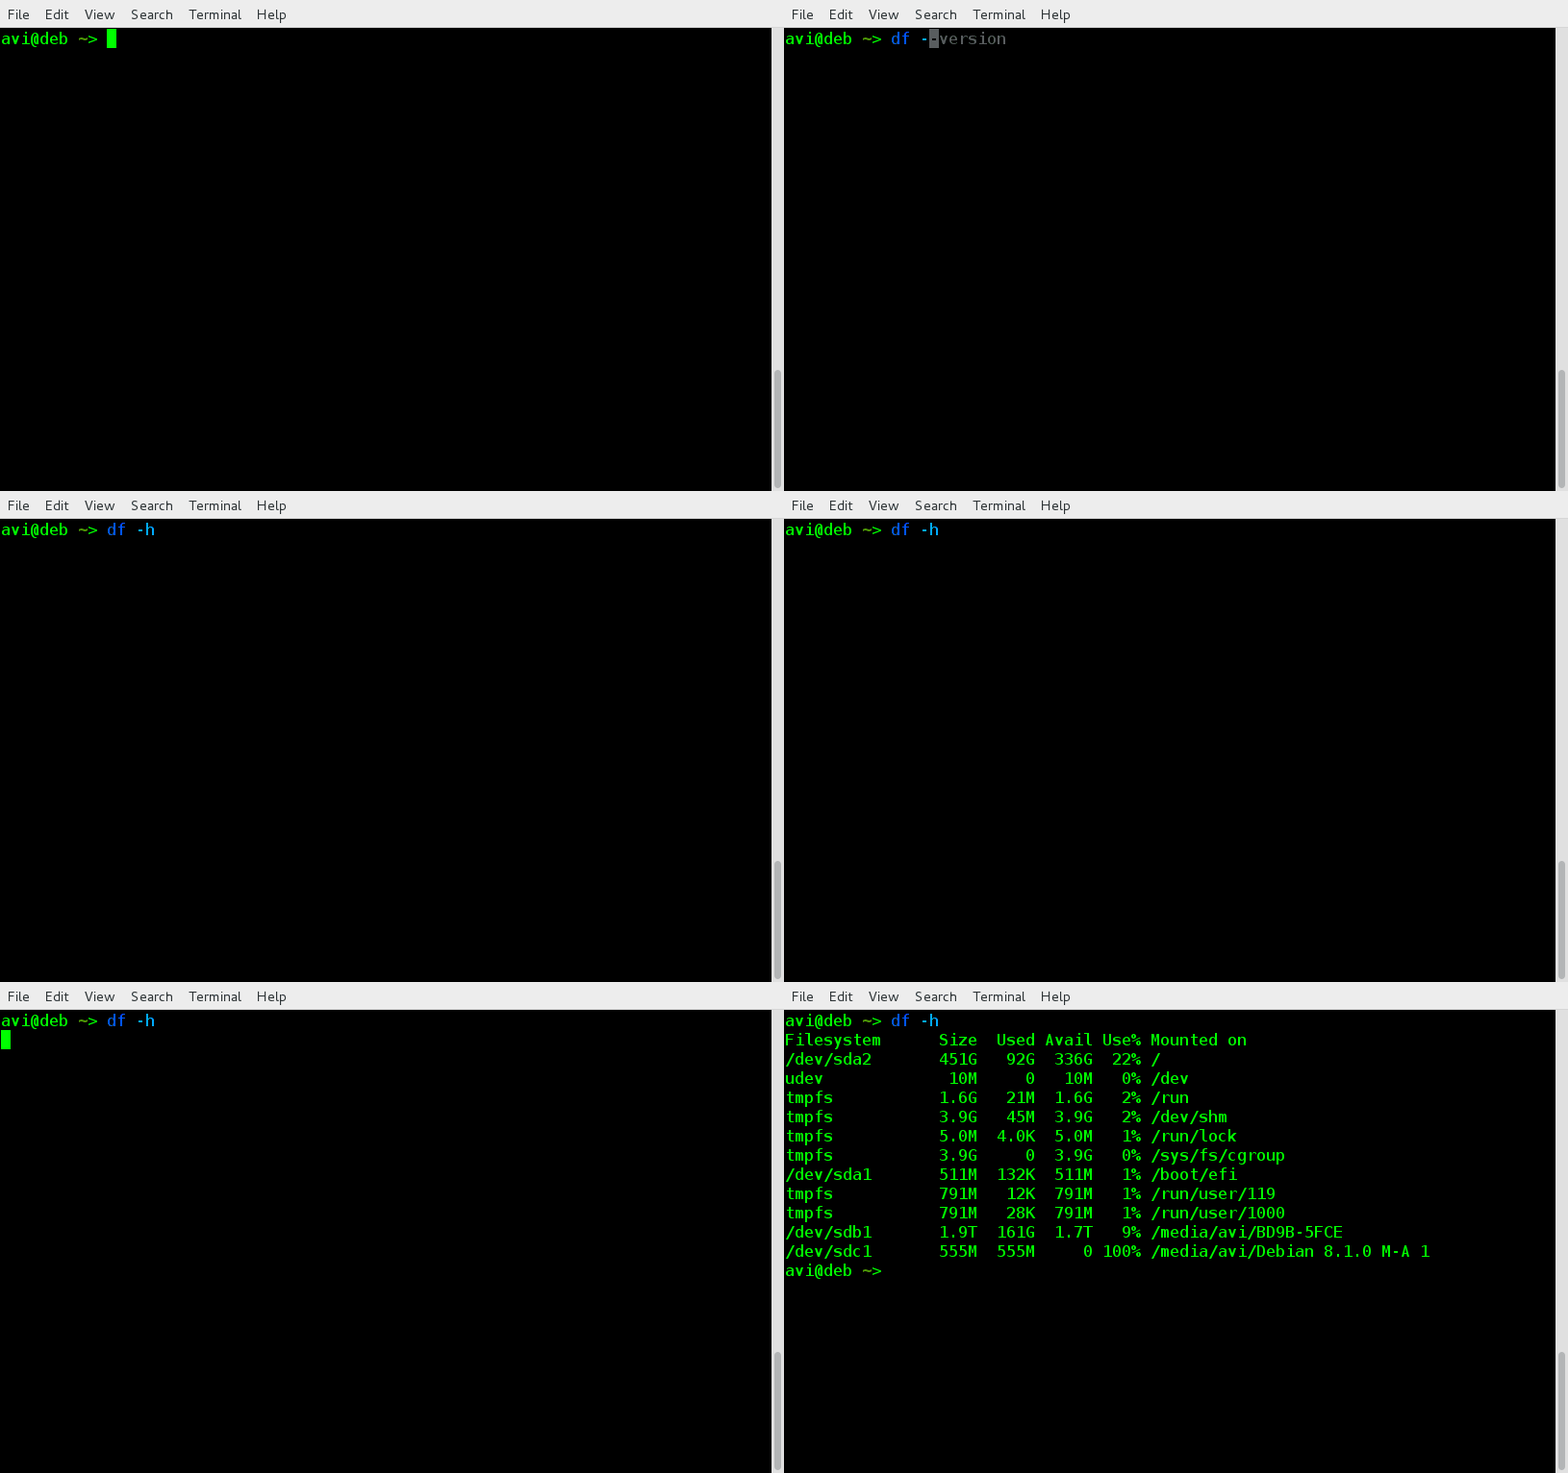
Sample Output
Filesystem Size Used Avail Use% Mounted on /dev/sda1 511M 132K 511M 1% /boot/efi
/dev/sda2 451G 92G 336G 22% /
/dev/sdb1 1.9T 161G 1.7T 9% /media/avi/BD9B-5FCE
/dev/sdc1 555M 555M 0 100% /media/avi/Debian 8.1.0 M-A 1
Notice the ‘Mount Point‘ name here, which we will be using later.
2. Create a directory /mnt/virtual_hdd where all these all file system will be grouped together as,
# mkdir /mnt/virtual_hdd
3. And then mount all the file-systems. Either as root or as a user who is a member of FUSE group.
# mhddfs /boot/efi, /, /media/avi/BD9B-5FCE/, /media/avi/Debian 8.1.0 M-A 1/ /mnt/virtual_hdd -o allow_other
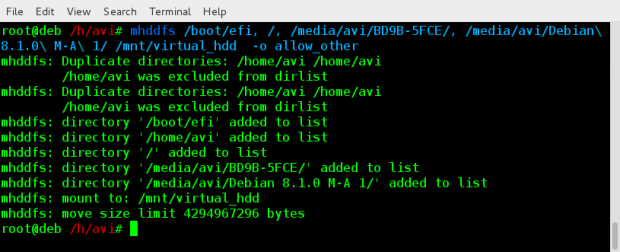
Note: We are used mount Point names here of all the HDDs. Obviously the mount point in your case will be different. Also notice “-o allow_other” option makes this Virtual file system visible to all others and not only the person who created it.
4. Now run “df -h” see all the filesystems. It should contain the one you created just now.
$ df -h
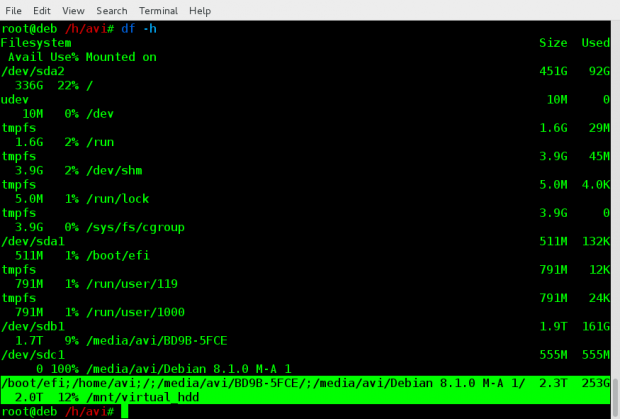
You can perform all the option to the Virtual File System you created as you would have done to a Mounted Drive.
5. To create this Virtual File system on every system boot, you should add the below line of code (in your case it should be different, depending upon your mount point), at the end of /etc/fstab file as root.
mhddfs# /boot/efi, /, /media/avi/BD9B-5FCE/, /media/avi/Debian 8.1.0 M-A 1/ /mnt/virtual_hdd fuse defaults,allow_other 0 0
6. If at any point of time you want to add/remove a new drive to Virtual_hdd, you may mount a new drive, copy the contents of mount point /mnt/virtual_hdd, un-mount the volume, Eject the Drive you want to remove and/or mount the new drive you want to include, Mount the overall filesystem under Virtual_hdd using mhddfs command and you should be done.
How do I Un-Mount Virtual_hdd?
Unmounting virtual_hdd is as easy as,
# umount /mnt/virtual_hdd

Notice it is umount and not unmount. A lot of user type it wrong.
That’s all for now. I am working on another post you people will love to read. Till then stay tuned and connected to Tecmint. Provide us with your valuable feedback in the comments below. Like and share us and help us get spread.

