Media files, including images and videos, are great for adding visual elements to your site. However, this comes at a price, as they hog a lot of your resources, including storage space and bandwidth. Worst of all, they can considerably slow down your site.
However, this doesn’t mean you should stop using media on your site. In fact, there are several solutions at your disposal for dealing with the problem. One of the most effective is using a Content Delivery Network (CDN), which stores and delivers your files from external servers. This makes your site faster and more reliable in the process.
In this article, we’ll look at how your site’s media files can harm its loading times, and why it matters. More importantly, we’ll discuss how you can avoid this by using a CDN, such as the one included with Jetpack. Let’s go!
How Media Files Can Affect Site Speeds (And Why It’s a Big Deal)
Media files don’t just make your site look pretty. There are actually plenty of benefits to using images and video to your website. For starters, images can help increase your conversions, while videos can present information in an engaging way that keeps visitors on your site for longer.
However, these positives aren’t without downsides. Both images and videos can be a big hog of site resources due to their potentially large file sizes. A site’s Media Library often accounts for the majority of its used storage space, especially if you regularly use high-quality images or self-host videos.
This (of course) can also have a negative effect on your site’s loading times. Because these files are larger they take longer to load, which can lead to increased bounce rates and even hurt your site’s ranking on search engines. In short, if your site takes a long time to load, people will lose patience and leave.
You obviously don’t want that to happen, and fortunately, there are several ways you can avoid it while still keeping your site’s visuals intact. First of all, you should ensure your hosting plan provides top-notch performance. You can also implement an image optimization solution that will compress your files without sacrificing their quality.
Another way is to simply not store your files on your site at all. For this, you’ll need a Content Delivery Network.
The Benefits of Using a Content Delivery Network (CDN)
In a nutshell, a Content Delivery Network (CDN) is a system of interlinked servers spread across the world. They can be used to store static versions of your files, so when a user visits your site they will be served the files from the server closest to their location. Not only does this help keep loading times at a minimum, but it also makes sure your site performs well regardless of your visitor’s geographic location.
This is particularly useful for media files. They’re rarely updated, so can be uploaded once then stored in their original state indefinitely. It also minimizes your bandwidth usage, frees up storage space, and the increased speed can even lead to a better Search Engine Optimization (SEO) ranking.
In addition, because multiple servers share the load of file transfers, your site will be more resistant to crashes and slowdowns due to high traffic. It can even help protect against basic Direct Denial of Service (DDoS) attacks.
The benefits of using a CDN are inarguable, but we don’t blame you if it can sound a bit technical to implement. Fortunately, this doesn’t have to be the case.
How to Use a CDN With WordPress
There are several simple CDN solutions available for WordPress, and also plenty of services you can use to quickly connect your site to a CDN, such as Cloudflare, MaxCDN, and Google Cloud CDN.
These all have their individual pros and cons, but a connecting factor is that most require you to pay for a premium plan. For non-technical users, they can also be troublesome to set up and manage, especially if you’re not comfortable with configuring their settings.
A great alternative that deals exclusively with image and video files is Automattic’s Jetpack plugin. This is extremely easy to use, particularly if you want a simple plug-and-play solution that requires zero configuration. You might even have Jetpack installed already, meaning using the built-in CDN is a no-brainer.
As we mentioned, Jetpack offers a CDN to host your images and videos, previously called ‘Photon’. Image hosting is included in the free plugin, while video storage is part of the Professional package.
The best part about this solution is it requires practically no configuration to set up. Simply activate each feature, after which every image and video you upload to your site will automatically be copied to Jetpack’s own servers. When visitors view your site, the CDN will deliver the saved versions, saving your site valuable time and bandwidth.
Before you proceed, it’s important to know that once you save a file to the Jetpack CDN, you won’t be able to update or delete it manually. Instead, you’ll need to contact the developers, who will be able to help you with your saved files.
The CDN will accept GIF, PNG, and JPEG images, while there are plenty of video formats available, including popular MP4, M4V, and MOV files, along with other niche formats such as OGV, and 3GP.
As for file sizes, the recommended maximum is 1GB per video. Jetpack can sometimes process video files up to 2GB, but the upload process is more likely to fail due to the increased size. Jetpack is not able to process any files larger than 2GB.
How to Activate Image and Video Hosting in Jetpack
First of all, you’ll need to install and activate Jetpack. Once you’ve done this, and connected to WordPress.com, you’ll be able to start activating features. Of course, if your site is hosted with WPWebHost, Jetpack Professional will be included by default, giving you one less step to worry about.
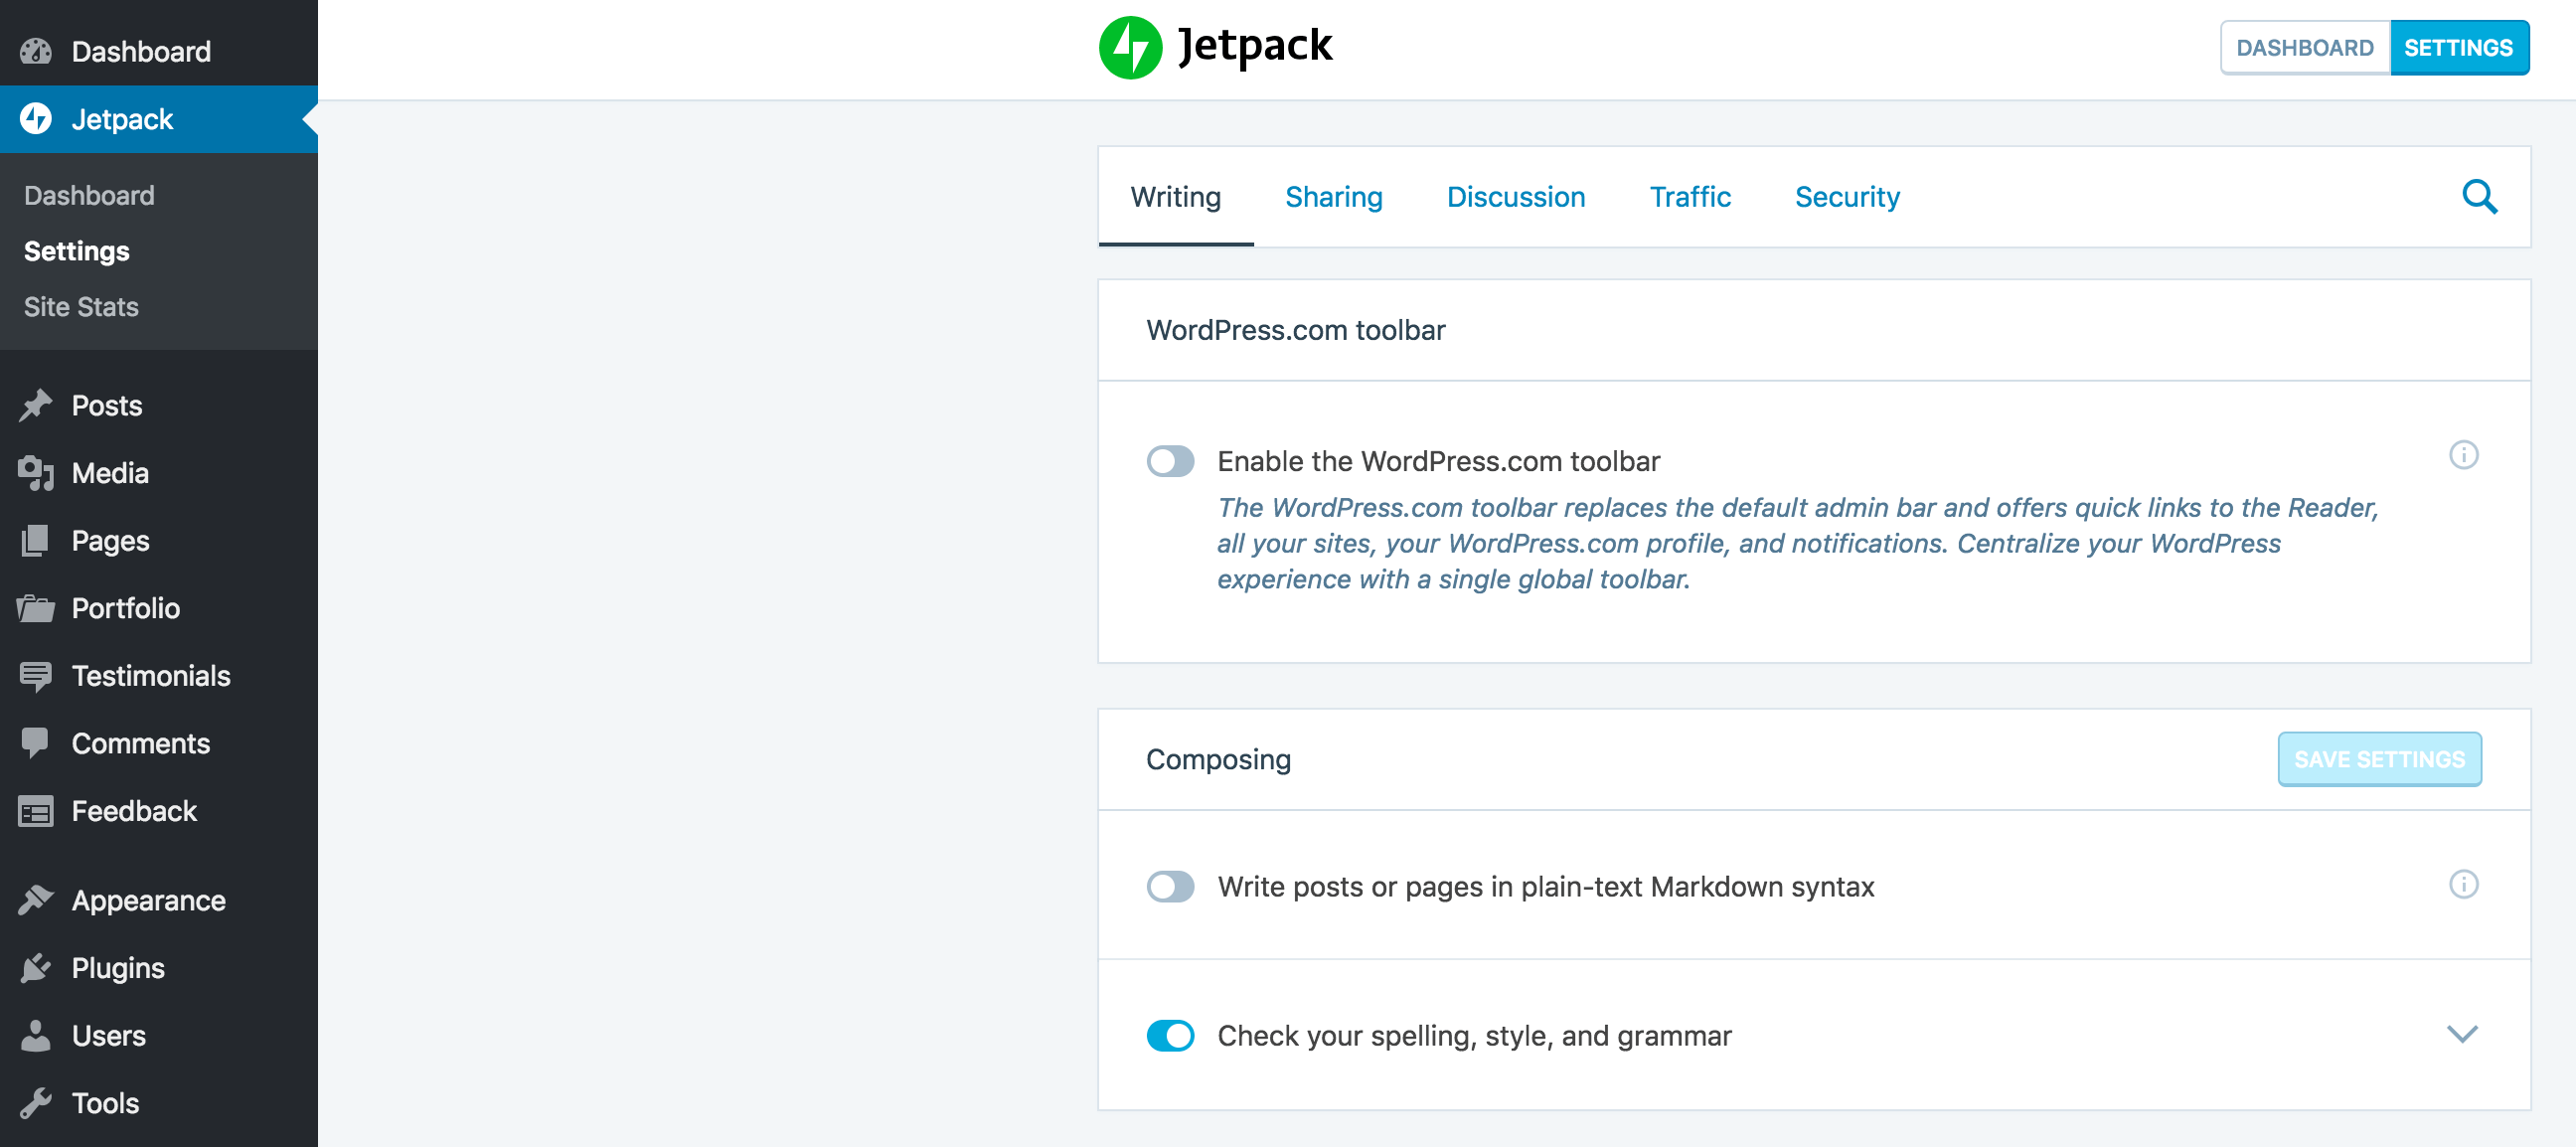
You can find both the image and video options by accessing Jetpack > Settings > Writing:
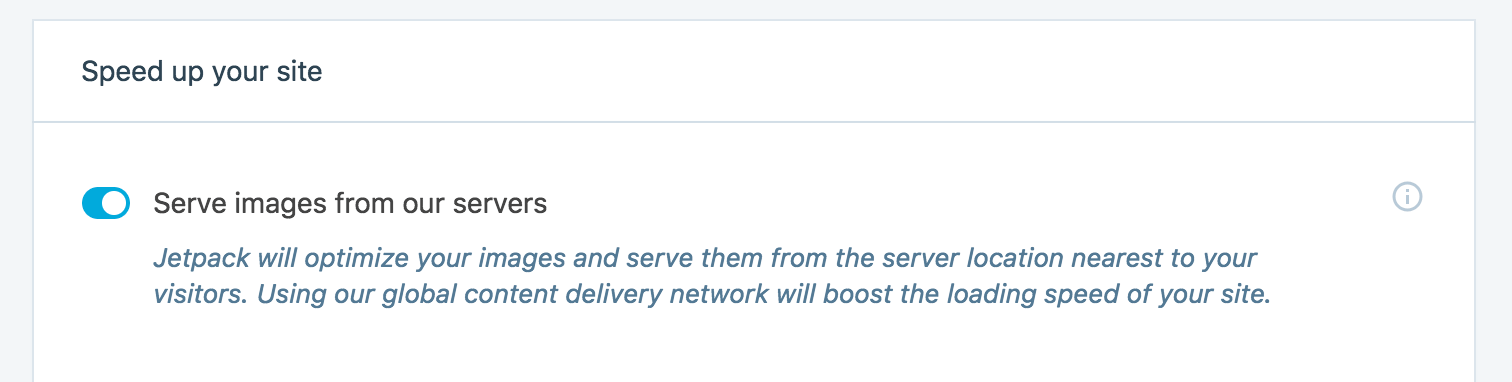
Scroll down the page to the Speed up your site section, where you’ll find options to activate the Image and Video CDN. Make sure to activate both Serve images from our servers and Fast, ad-free video hosting:
That’s everything you need to do! From this moment forward, you can upload videos and images to your site like you normally would, and they’ll be delivered using the Jetpack CDN. You can now relax and enjoy the benefits of enhanced site performance.
Conclusion
Using media files is great for supplementing your text content and creating visually engaging websites. However, this can come at a price of increased loading times and could hog a lot of your site’s storage space. The solution is to use a Content Delivery Network (CDN) – such as that found within Jetpack – to store and deliver your media files.
Not only will this free up storage space, it will also significantly improve your site’s speed. By uploading your media files to Jetpack’s servers, your site doesn’t have to use its own resources to load them each time. This will ensure a more consistent and fast experience for all your visitors.
Do you have any questions about using Jetpack’s Image and Video CDN? Let us know in the comments section below!
Image credit: Pixabay.